Welcome to OroCRM video tutorial series. This is Alex with OroCRM and in this video, I will demonstrate how to set up an integration with MailChimp.
OroCRM supports an out of the box integration with MailChimp which allows you to:
- Map OroCRM’s Marketing Lists to Segments of a MailChimp Subscriber’s Lists
- Keep those synchronized automatically
- Use those Segments within MailChimp to create email campaigns and import the results to OroCRM. If an Email Campaign has been created as a result of integration with MailChimp its record will be automatically created in OroCRM and related statistics will be uploaded and synchronized.
- Use MailChimp campaign statistics and OroCRM’s reporting tools to analyze your campaign’s efficiency
To begin, the Mailchimp extension should be installed in your instance of OroCRM.
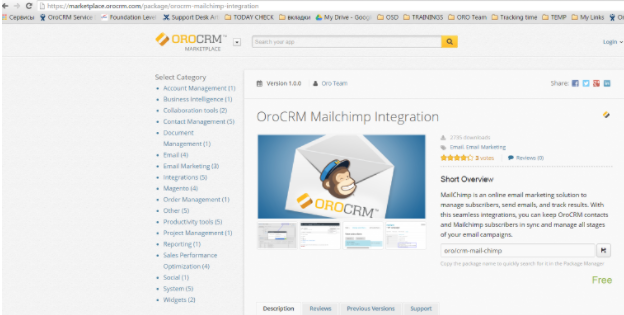
For On Premisis users you can download the MailChimp extension on the OroCRM Marketplace by the following the link on your screen https://marketplace.orocrm.com/package/orocrm-mailchimp-integration
B2B SaaS users should have this extension preinstalled already.
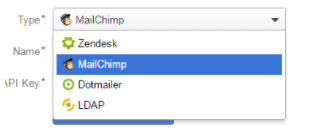
To configure your integration with OroCRM and Mailchimp you must create or retrieve your API Key. To do this, Log into Mailchimp and navigate to your name then select Account. Click Extras and select API Keys. At the bottom of a list with API Keys press button “Create a Key”. A newly created API Key will appear at the top of the list. Copy the Key created. Log into OroCRM account. Navigate to System → Integration → Manage integrations and click “Create integration” button. The “Create Integration” form will appear. Set the type to “MailChimp” and the form will be reloaded to display specific integration requirements for Mailchimp.
Define the integration name as it will be referred to in OroCRM. Paste the API Key generated by MailChimp.
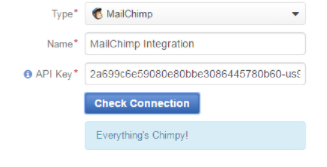
Click “Check Connection” button to make sure the key is valid.
Confirmation note “Everything’s Chimpy” should appear.
Set the Activity Update Interval to a period of how long email campaign activities should be received. This should be set based on the length of your campaigns and data storage requirements specific to your instance of OroCRM
The Default Owner defines the list of users who can managed the integration and data synchronized within it. All entities imported within the integration will be assigned to the selected user.
By default the Owner is the currently signed in User. This can be changed by using the select menu, or by typing User’s name.
Use the Synchronization Settings section to enable or disable two way synchronization. By default, Enable Two Way Sync box is left unchecked.
If two way sync remains unchecked unsubscribes will pass from Mailchimp to OroCRM.
If enabled, subscription status can be passed from OroCRM to Mailchimp in addition to the other way around.
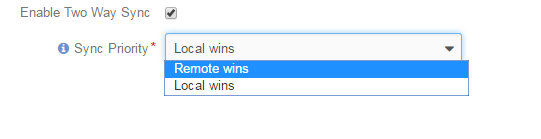
Next, defining the Sync priority.
Remote wins means that MailChimp data will be considered the master and overwrite any conflicts with OroCRM. Local wins means that OroCRM data will be considered the master and overwrite any conflicts with MailChimp.
Once all the integration details have been specified click the “Save” button. The integration has been successfully configured. It will now appear in the Integrations Grid.

An initial synchronization will be required to download the all of the lists currently in Mailchimp. The status of this synchronization can be check by clicking on the integration then reviewing the statuses section.
Now you can map contacts of an OroCRM Marketing List or Magento Abandoned Cart Campaigns to a segment of a subscribers list in MailChimp.
To do this, navigate to Marketing → Marketing Lists and select the list that you want to use.
If your marketing list is suitable for the connection, the “Connect to MailChimp” button will be displayed.
Thank you for watching! For more Tutorial videos please visit our CRM training center.